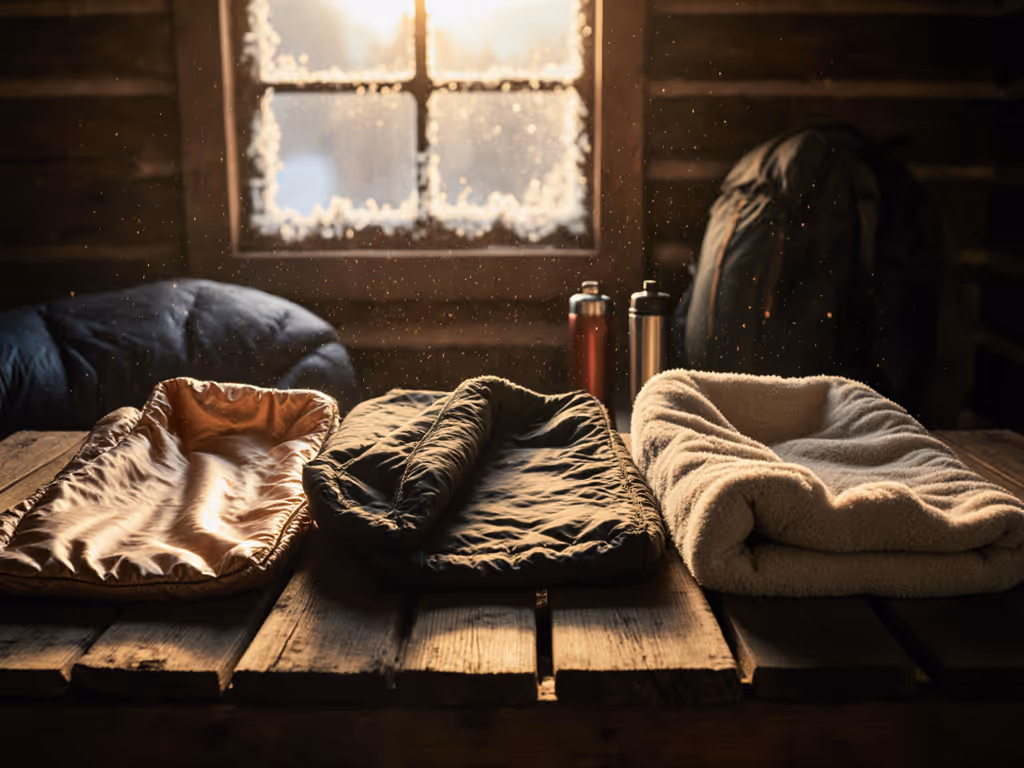
Sleeping Bag Draft Tube Comparison: Warmth, Drafts, Moisture
By Maya Ndlovu • 14th Jun
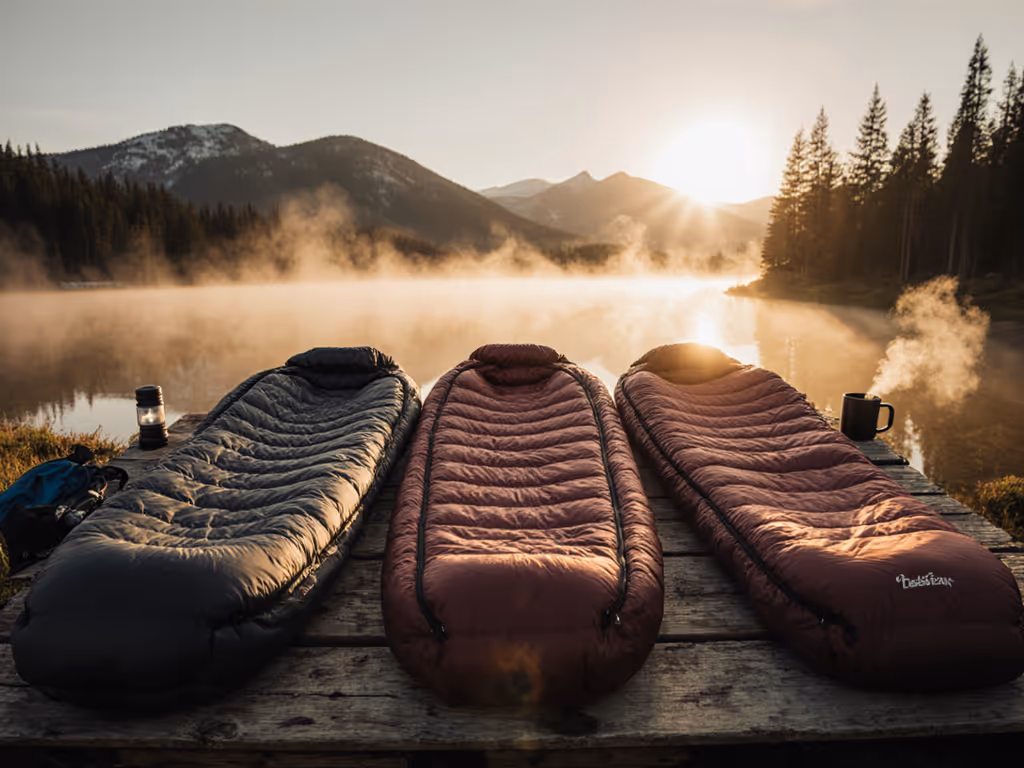
In this sleeping bag draft tube comparison, we are not just ranking features on paper; we are mapping how different draft tube and collar designs change what you actually feel at 3 a.m.: cold leaks, clammy fabric, or that blissful still pocket of warm air. If you have ever wondered whether "draft collar effectiveness testing" is worth your time, the answer is yes, because those small tubes of insulation often decide whether a bag's rating matches your real-world comfort.
Comfort is multi-factor: fit, feel, fabric, and freedom.
FAQ 1: What exactly is a draft tube and why does it matter?
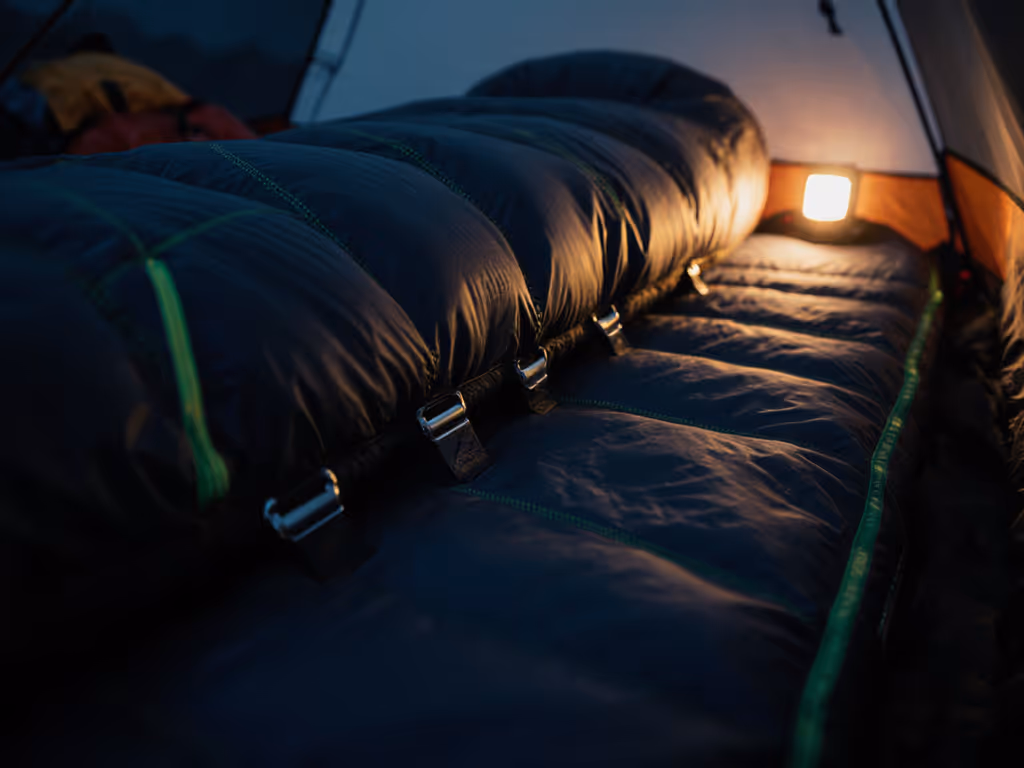
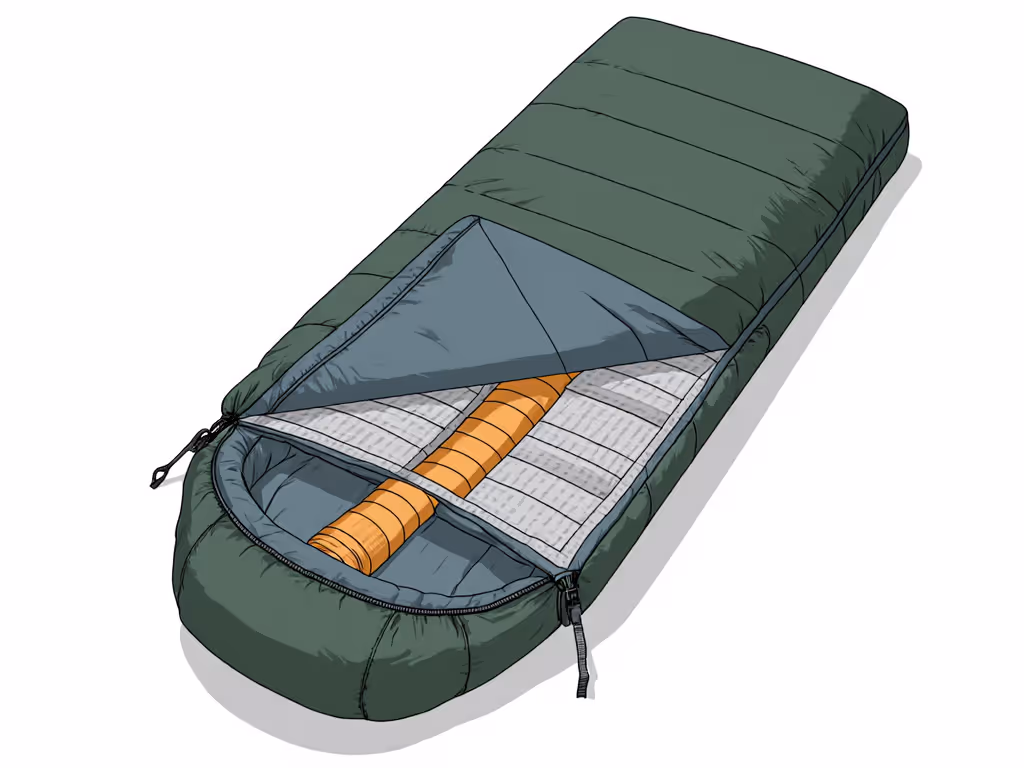
A draft tube is an insulated flap or tube that runs alongside the sleeping bag zipper to block cold air from leaking through that seam.[2][4] The zipper is a structural weak spot (usually with less loft and tiny gaps between teeth), so without a barrier you get a narrow but powerful cold leak right along your ribs.[4] For construction details that reduce snags and leaks, see our sleeping bag zipper guide.
Most modern bags use the same insulation in the draft tube as in the rest of the bag (down or synthetic), stitched into a long baffle that hangs just inside the zipper.[4] When you zip up, that tube should puff up and sit between your body and the zipper, creating a continuous "wall" of still air that reduces convective heat loss.[4][11]
Good design details you’ll see in higher-end bags:
- Continuous, full-length tube: runs from near the hood opening down to the foot or almost to it, minimizing gaps.[2][4]
- Differential cut: inner lining slightly smaller than outer shell so the tube stays round and lofted even when you move.[11]
- Anti-snag zipper guard + tube: careful tape or stiffeners along with the tube, so warmth and usability align.[6]
Thermally, the draft tube is part of a system: hood, collar, baffles, and zipper tube together can prevent a large share of otherwise avoidable heat loss.[5] When you "feel" a bag is colder than its rating in mild wind, it is often because that system is leaking at one of its seams, and the zipper line is a usual suspect.
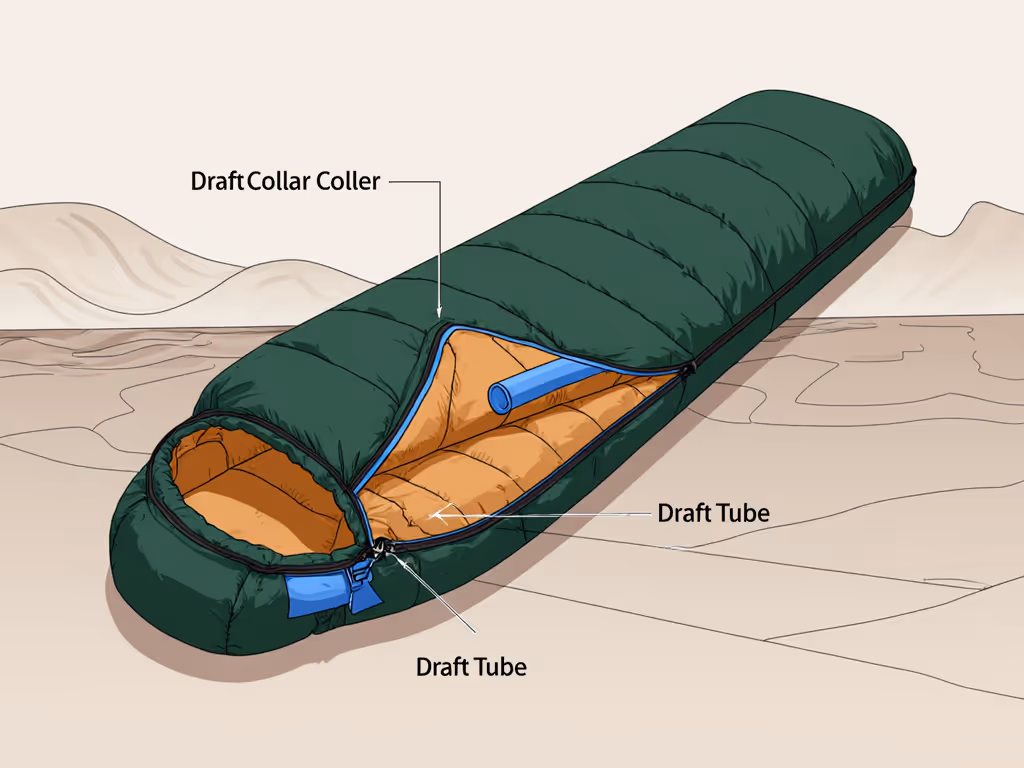
FAQ 2: How is a draft collar different, and do I need both?
A draft collar (or shoulder draft tube) is a separate insulated roll that circles your upper chest and shoulders, just below the hood opening.[3][7] It creates an inner seal that stops warm air from pumping out of the bag every time you shift position, often called the "bellows effect".[5][7]
Key differences:
-
Location
-
Draft tube: runs along the zipper.[2][4]
-
Draft collar: wraps around your neck/shoulder line inside the bag.[3][7]
-
Main job
-
Draft tube: zipper draft prevention, stopping cold air sneaking in horizontally along your side.[2][4][5]
-
Draft collar: air seal at the top, keeping the warm bubble from escaping upward when you move or when the hood opening is vented.[3][5][7]
-
When it matters most
-
Draft tube: any temp where wind, tent venting, or side sleeping exposes the zipper line.
-
Draft collar: especially important in sleeping bags for cold weather, where losing warm air from your core can quickly make a 0 °C bag feel like a +5 °C bag.
Some brands describe this as a "shoulder draft tube" instead of collar, but the function is the same: a raised, insulated barrier at the neck designed to keep cold air from entering and warm air from leaving.[3]
For shoulder-season or winter use, I strongly prefer bags that have both: the tube along the zipper and a true collar around the shoulders.[3][5] The hood, draft collar, baffles, and draft tube together form a thermal management system that drastically cuts heat loss when it is well executed.[5]
FAQ 3: In a sleeping bag draft tube comparison, what design features matter most for warmth?
Let’s compare the key design variables that drive insulated draft tube performance, and what they mean in human terms.
3.1 Tube size and shape
Think of the draft tube cross-section like a gasket between two metal plates.
- Thin, flat flaps: common on cheaper bags; they look like a simple insulated strip. When you move, they easily fold or flip out of place, leaving gaps. These help, but they are easy to compress to nothing if you are a restless or side sleeper.
- Rounded, puffed tubes: higher-end designs use a true tube or double-tube that stays more cylindrical. These keep some loft even when slightly compressed, which maintains a barrier of still air.[12][15]
For genuinely cold conditions, prefer taller, rounder tubes that look overbuilt compared to the rest of the bag. They add a small weight penalty but dramatically cut perceived drafts.
3.2 Single vs double draft tubes
Some cold-weather bags use two overlapping tubes that interlock around the zipper line.[15]
- Single tube: lighter, simpler. Adequate for milder temps, especially if you are in a double-wall tent and not camped in a wind funnel.
- Double tube: each tube overlaps the zipper from opposite sides, so even if one is displaced, the other remains in contact.[15] This layout is noticeably more forgiving for toss-and-turn sleepers.
3.3 Attachment and alignment
How the tube is anchored to the bag matters as much as its thickness.
- Tube sewn directly behind zipper: common approach; works if the tube has enough loft and the zipper tape is narrow.[2][4]
- Offset tube: some designs place the tube slightly offset so the zipper teeth are "shadowed" by insulation rather than sitting directly under a compressed portion.[12]
- Snaps or toggles: in some bags you can snap the tube closed independently from the zipper to lock it in place around your torso.
When you try a bag in person, zip it up and run your hand from neck to knee along the zipper inside. Any section where you can easily feel the hard zipper teeth or a flat seam is a potential draft source once you are outside in wind.
3.4 Integration with hood and collar
High-end designs treat the draft tube as part of a continuous perimeter of insulation: hood → collar → zipper tube → footbox.[5][12] To understand how baffle layouts influence this perimeter seal, read our sleeping bag baffles guide.
If the tube stops 10-15 cm short of the hood, there is a small triangular zone where warm air can leak out between your chin and the zipper, something you will feel immediately in a cross-breeze. Look for tubes that extend nearly all the way into the hood area and marry cleanly with the collar.
FAQ 4: How can I test draft collar effectiveness at home?
You do not need lab gear for draft collar effectiveness testing. A calm room, a fan, and a bit of patience can reveal a lot.
4.1 The tissue test (for drafts)
- Lay in your bag on your usual pad. Zip up fully.
- Place small strips of tissue paper along the inside of the zipper and across your collar line.
- Aim a fan or a cool hair dryer (no heat) along the outside zipper and hood area.
- Watch where the tissue flutters.
If tissue moves along the zipper line, your zipper draft prevention is weak in that region. If it moves at the collar, either the collar does not cinch well or the fit at your shoulders is wrong for your shape.
4.2 The temperature-delta check (for insulation continuity)
If you have a simple probe thermometer or an infrared "temp gun", you can measure temperature deltas:
- After 15-20 minutes in the bag, measure the air temp just inside the collar and along the zipper line.
- Compare to ambient room temperature.
You want the inside temp to be markedly higher than ambient, and, crucially, similar all the way down. A noticeably cooler reading at mid-zip suggests the tube is compressing too much or not continuous.
4.3 The movement test (for side and stomach sleepers)
Body-position callout:
- Roll from back → side → semi-fetal → partial stomach and back again.
- Note when you feel cold streaks on the side where the zipper sits.
Side sleepers, this is where drafts often show up that never appear on a store floor when you briefly lie flat.
If you feel a cool "knife line" on your hip or ribs during these moves, that is the zipper line leaking, typically from a thin tube, poor alignment, or a bag that is cut too tight for your frame.
FAQ 5: What about draft tube moisture management and clamminess?
A warm but clammy draft tube is just as disruptive as a cold leak. Draft tube moisture management is about how quickly those insulated tubes absorb, retain, and release moisture from your breath, sweat, and tent condensation.
Industry experience and testing of bag fabrics show a pattern: when fabric breathability (MVTR) is low, moisture accumulates inside the insulation, especially at colder surfaces like the zipper area.[11] Get material-specific tips in our moisture-wicking shell fabrics guide. That can lead to:
- Damp down or synthetic fill in the tube, reducing loft and warmth.
- Clammy fabric hand against your neck or ribs, making you feel cooler than the thermometer suggests.
- A morning tube that feels heavier and slightly collapsed compared to the rest of the bag.
From a comfort-diagnostic standpoint, ask yourself on cold, humid nights: "Is the zipper side of my bag clammy before the rest?" If yes, the tube may be trapping moisture.
Strategies:
- Prefer bags with breathable inner linings at least as breathable as the shell, so moisture can migrate away from your skin into the tent air.
- Avoid fully sealing the hood and collar in humid conditions, and leave a small vent so your breath doesn't dump directly into the collar and tube.
- In coastal or very humid environments, consider slightly roomier cuts and minimally restrictive collars; that extra freedom lets you micro-vent without creating huge drafts.
On one especially soupy coastal trip, I woke up sticky inside a bag whose rating was far lower than the night's low, but the issue was not raw temperature. The combination of dense shell fabric, narrow cut, and aggressive collar trapped every bit of moisture. A switch to a more breathable liner, slightly looser upper girth, and higher-MVTR shell turned those mornings dry, and the draft tubes finally felt like pillows instead of damp hoses.
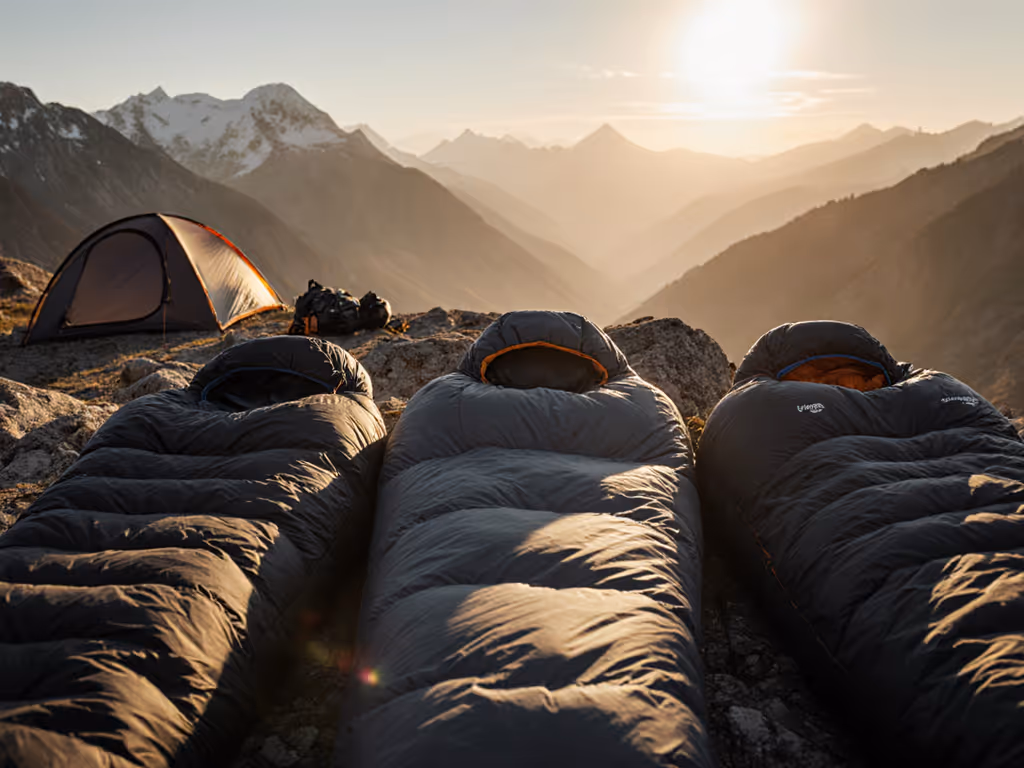
FAQ 6: Do draft tubes really help in wind and very cold conditions?
In sheltered, wind-free conditions, a mediocre tube might pass. Add wind, and differences in insulated draft tube performance become obvious.
Physics first: wind increases convective heat loss across your bag's surface.[11] Anywhere the insulation is thin or disrupted (like zippers and seams), that moving air pulls warm air out faster. A good draft tube acts as a local "thickening" of insulation precisely where the shell is weakest.[4][11]
Brands that design for serious cold routinely emphasize oversized draft tubes and collars as critical winter features, right alongside fill power and total loft.[5][12][15] Some use continuous down-filled tubes specifically described as minimizing heat loss along the zipper line.[6][15]
If your camping often involves:
- Single-wall tents with more air movement,
- Bivy sacks, or
- Exposed alpine or ridgeline camps,
then treating the draft tube like a "nice-to-have" is a mistake. In those scenarios it is part of your primary wind protection.
A quick reality test: if you can feel outside gusts as distinct cool pulses along your zipper inside the bag, your tube is under-built for those conditions, even if the stated temperature rating looks appropriate on paper.
FAQ 7: How do different sleep positions change draft risk?
Here’s a fit diagram in words, by position.
Side sleepers
When you curl up, the top panel of the bag wraps over you and the bottom panel tightens around your back. The zipper, and its tube, often rotates closer to the top of your hip.
- A narrow mummy can pull the tube away from your body, leaving a small crescent of space where cold air can circulate.
- If the tube is stiff or flat, it can fold, exposing zipper teeth.
For side sleepers, prioritize:
- A bit more shoulder and hip girth, so the bag can wrap without yanking the tube open.
- Softer, more conforming tubes that drape onto your side rather than fight your curvature.
Side sleepers, this is where drafts most often emerge: that hip-to-rib zone where the tube lifts off as you curl. For model picks and fit strategies, see our side sleeper sleeping bags guide.
Back sleepers
On your back, the tube usually hangs neatly along your side. Back sleepers tend to get full value from even middling draft tube designs, as long as the collar is well-shaped and cinched. Focus more on collar shape and hood synergy.
Stomach and sprawlers
If you rotate partially onto your stomach or sleep with one knee hiked, you are constantly torquing the bag's upper half.
- Look for double tubes or tubes with internal anchor points so they stay near the zipper even when twisted.[15]
- Favor bags whose zippers stop short of the very bottom; long center-bottom zippers can expose calves and feet when you splay your legs.
FAQ 8: For sleeping bags in cold weather, what should I prioritize: draft tube, collar, or pad?
This is where systems thinking beats spec sheets. A few guiding heuristics:
- Pad first: If your pad's R-value is too low, no amount of draft tube will save you from conductive loss to the ground. Upgrade the pad before obsessing over tube design.
- Collar and hood second: In genuinely cold conditions, a well-designed collar can feel like a 3-5 °C upgrade in perceived warmth by preventing warm air from escaping.[5][7]
- Draft tube third, but critical: Once pad and collar are dialed, the tube decides whether your bag's side feels "solid" or streaky as temps drop and wind picks up.[4][5]
Remember that ISO/EN ratings assume controlled lab conditions and a standard mannequin, not your personal metabolism, pad, and shelter. For a deep dive into lab ratings versus field results, read EN vs ISO ratings tested. Many cold-sleepers find they need a margin of 5-8 °C warmer than the stated comfort rating, especially in humid or windy microclimates.
When you are comparing bags:
- If two models have similar ratings and loft, choose the one with the better-integrated draft system: tube, collar, and hood that clearly form a continuous seal.[5][12][15]
- For shoulder-season versatility, consider a bag with a robust collar/tube system that can be easily vented: you can always open the collar and unzip partially, but you cannot add a missing tube at 2 a.m.
FAQ 9: How do I apply all this to my next purchase or my current bag?
Here is a simple, data-driven checklist you can use either while shopping or with the bag you already own:
- Visual inspection
- Is the draft tube continuous from hood area down most of the zipper?
- Does it look thicker or at least as lofty as the adjacent baffles?[4][15]
- Fit and position test
- Lie in your typical position(s). Does the tube stay in contact with your body, or float away as the shell tightens?
- Can you cinch the draft collar to lightly hug the base of your neck without choking or leaving gaps behind your shoulders?[3][7]
- Movement and wind test
- Run the tissue + fan test along the zipper and collar. Note where it flutters.
- Roll through your usual movements; log where you feel streaks of cool air.
- Moisture and condensation checks
- On a humid or rainy trip, feel the tube and collar in the morning. Are they wetter than the rest of the bag?
- If yes, try sleeping with slightly looser hood/collar and more tent venting on your next night, and note the difference.
- Temperature delta logging
- Keep a small trip log: overnight low, shelter type, pad R-value, what you wore, and whether you felt drafts or clamminess.
- Over a few trips, patterns emerge that tell you whether your limiting factor is pad, overall loft, or specifically draft management.
Comfort is multi-factor: fit, feel, fabric, and freedom. Fine-tuning your draft tubes and collars is often the lowest-risk, highest-comfort tweak once baseline warmth is in place.
Where to go from here (Further Exploration)
Use this as a starting point for your own draft tube moisture and warmth experiments:
- Test your current bag in controlled at-home conditions before your next shoulder-season trip.
- Compare notes between two bags you own (or can borrow), focusing only on draft tube and collar behavior, not overall loft.
- Pay extra attention on your next trip to where you feel cold or clammy: zipper line, neck, back, or ground contact.
As you build that personal dataset, you will move from guessing at warmth to running a tailored sleep system, pad, bag, hood, collar, and draft tubes working together for your body and your routes. And once your nights are reliably warm, dry, and draft-free, you can confidently shift attention back to weight, sustainability, and dialing in the rest of your kit.
Related Articles